Great typography can elevate any project and make it look more polished. But when you take text and apply creative and unique text effects, you create a completely different work of art.
In this roundup, we’ve gathered the best Adobe Illustrator tutorials for designing highly creative text effects. By following these tutorials, you’ll take your Illustrator skills to a whole new level and be able to make your design projects more interesting.
You might also like these Photoshop text effect tutorials or these free Photoshop layer styles for creating stunning text effects.

Unlimited Downloads: 13,000+ Adobe Illustrator Templates
1,000,000+ Illustration & Vector Templates, Brushes, Logos, Icons, and much more!
In this video tutorial you will learn how to slice text, create your own typeface, and create your own effects. Once you’re done, you will be able to use the concepts from this tutorial on any existing fonts of your choosing.

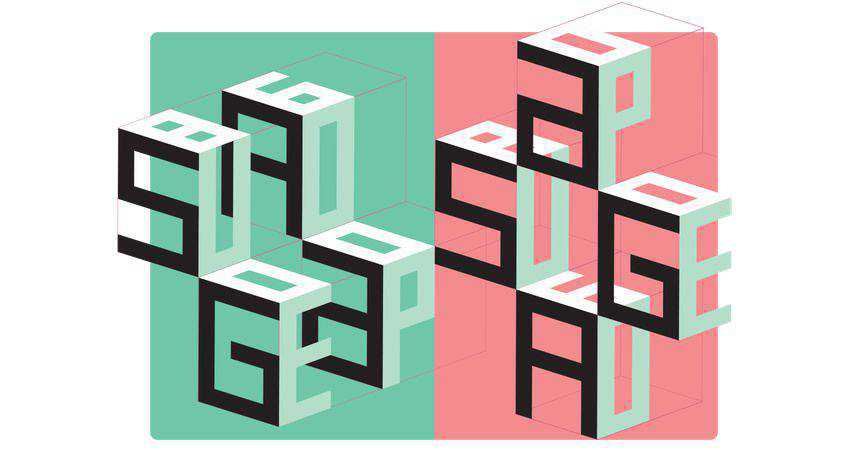
Learn how to make alphanumeric cubes that will give you a whole new perspective on your text projects. By using this method you will be able to transform flat text and give it a radically different 3D view.
Transform simple letters into characters all of their own. This tutorial shows you how to capitalize on Illustrator’s appearance panel to stylize the text and create their eyes. Then finish it off by giving them legs with the pen tool.


This radio show template package saves you time by giving you exactly what you need in Illustrator and Photoshop file formats. This template is completely print ready for you to use in your next project.

Use simple shading technique on key portions of letters to add an illusion of depth to the letter. You can either leave the text clean and crisp or embellish it by adding a distressed or grain effect. This tutorial shows you how it’s done.

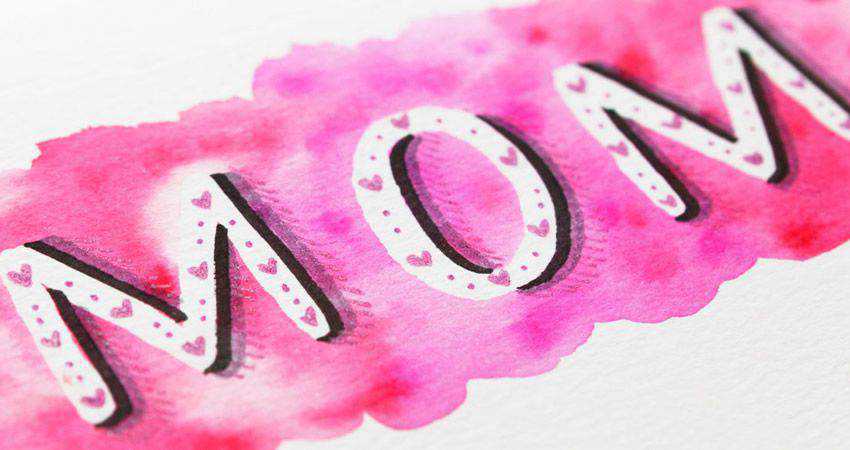
In this tutorial, Teela shows us how to create a hand lettered watercolor Mother’s Day card. This is a perfect tutorial for Mother’s day and you can even apply this design to other projects.
Learn how to create pixel-like 3D letters using Illustrator’s 3D extrude and bevel effects. You will create compound paths, colorize and organize shapes, create simple backgrounds, and add subtle shading by using the transform effect.

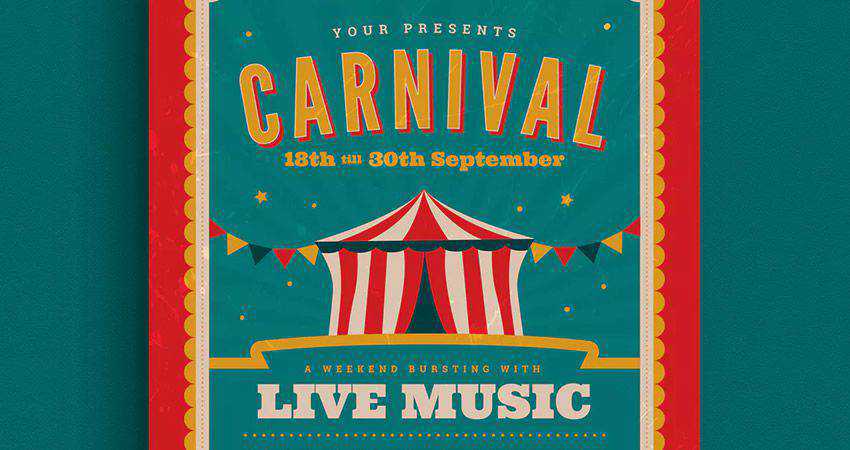
Use this retro event flyer to save you time for your next event. Includes Illustrator and Photoshop files and is 100% vector which means it’s scalable and completely editable. Just edit and print!
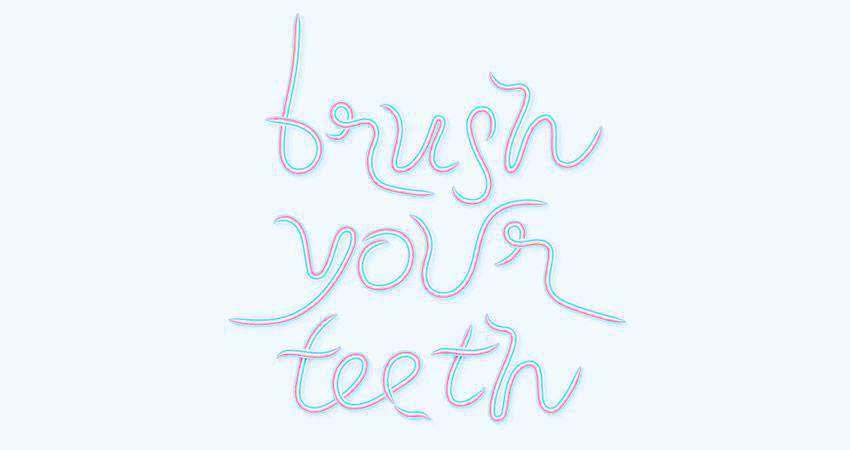
Tired of the same old typography? Then try this tutorial on for size and create your very own toothpaste pattern. You will leverage basic tools and effects, transformation techniques, patterns and pattern brushes to make a truly unique design.
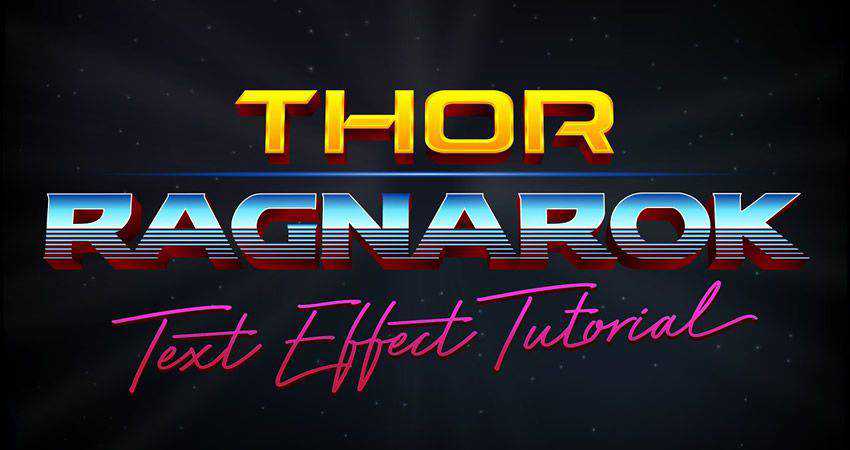
Find inspiration in the 1980’s to re-create the title for Thor Ragnarok. In this video tutorial, you will learn how to use Illustrator’s 3D tool for the text appearance and then how to get the chrome look with gradient fills.
Does your typography need a dash of bling to set it apart? Then you found the perfect tutorial. Follow the steps in this tutorial to transform your text into 3D and then turn it from bland to gold in few simple steps.

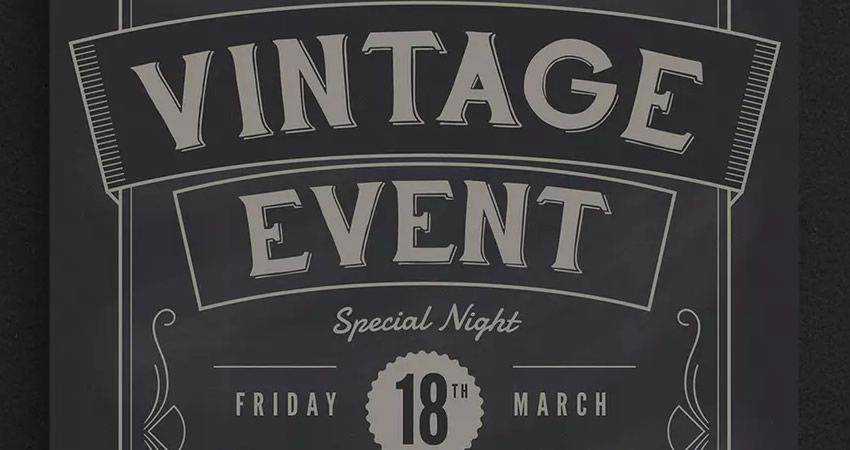
Need a minimal vintage looking flyer? Look no further than this template that gives you everything you need in both Illustrator and Photoshop format. The template uses beautiful typography and a dark background which makes it look high-end.
This video tutorial is the perfect way to learn how to transform your typography from normal to 60 in a matter of minutes. Learn how to use simple shapes and pattern groups to make your text fly right off the canvas.
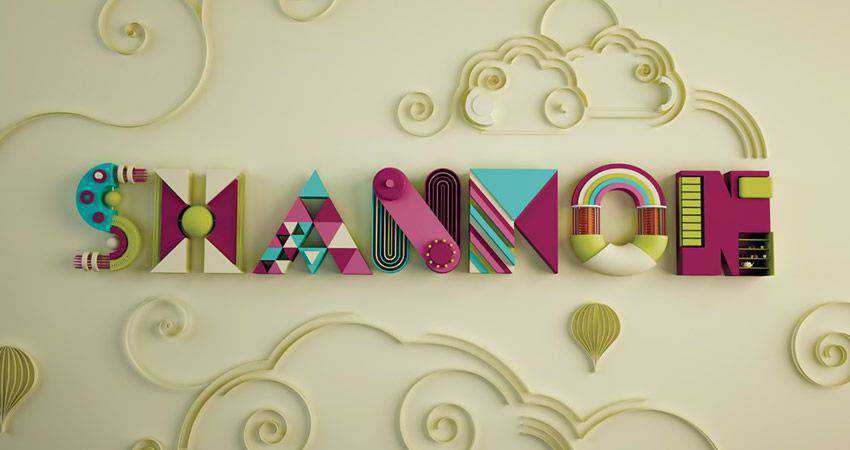
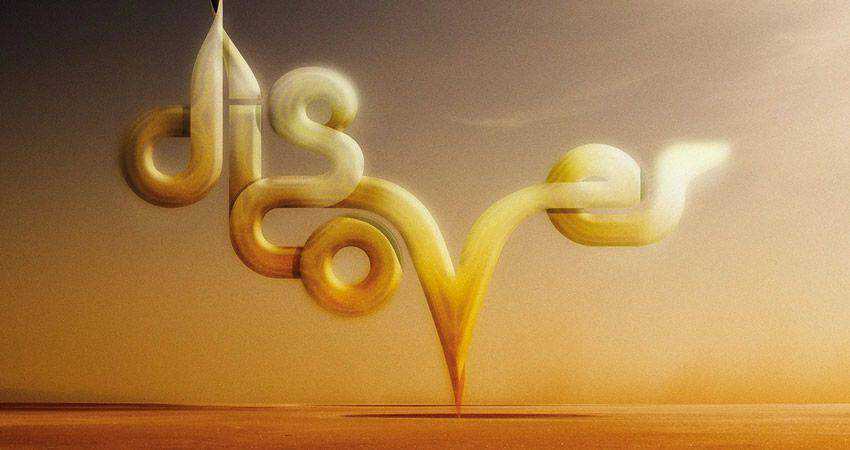
In this abstract tutorial, Murilo Maciel shows us how to plan a typography project in Illustrator and create a masterpiece in Cinema 4D. Learn how to break down letters into their basic geometric shapes and transform them into colorful patterns.
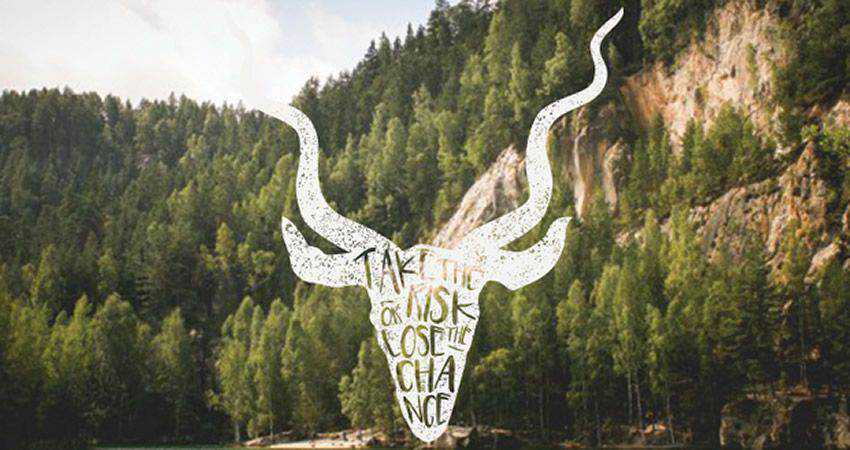
How to Create a Vintage Typography Illustration
By following this tutorial, you will learn how to place text inside an image and then make it feel like it was hand lettered to add a unique look as well as how to leverage textures to create a more distressed appearance.
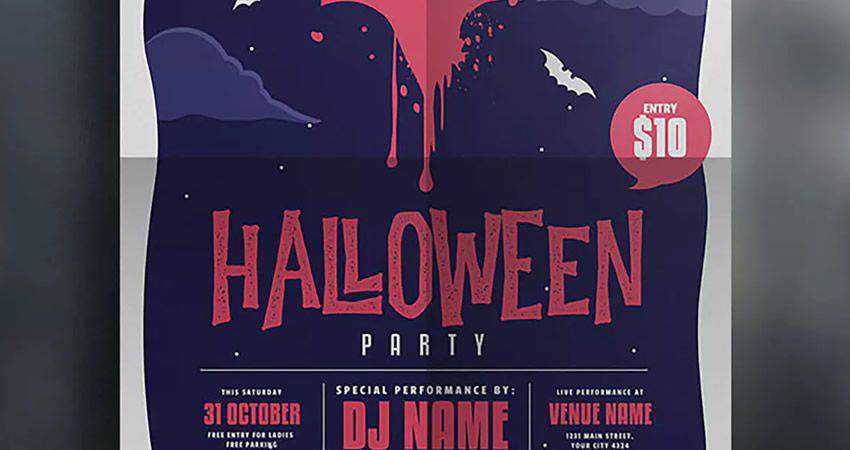
This Halloween flyer template that has all the goodies you need to go from edits to printing. The template features a colorful, yet slightly mysterious look, perfect for advertising your Halloween party.
With this step by step tutorial, you will learn how to set up a simple grid and create the shapes you’ll use to create your pattern brush. With simple strokes, basic blending, and transform effects; you will be able to create a unique design.
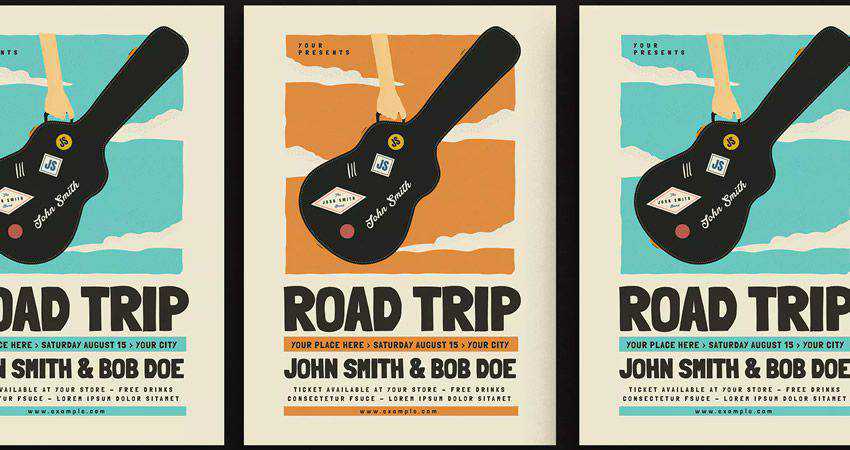
Working on a project that calls for a road trip gig flyer? Then this template from Envato Elements is just what you need. The template features a slightly retro look that’s sure to make your flyer pop.
With this video tutorial you’ll be able leverage Illustrator’s shape building capabilities and then use Photoshop to flesh out the image to make it look like an illuminated neon sign that can be found almost anywhere.

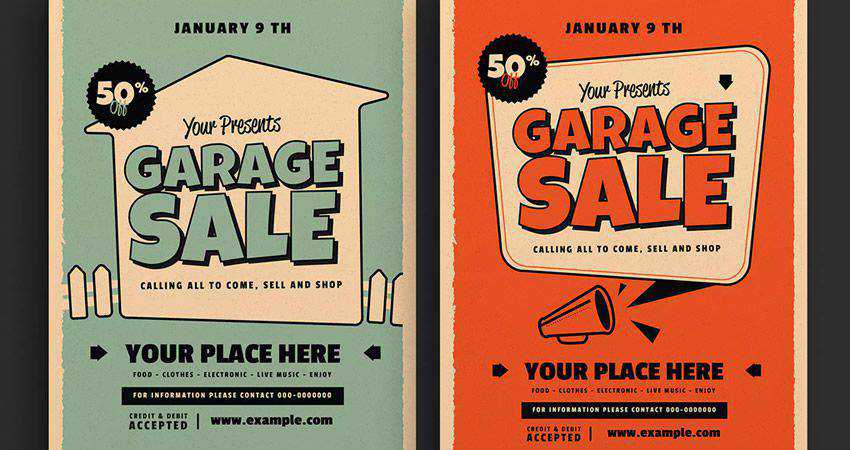
Draw attention to your garage sale with this colorful Garage Sale Event Flyer from Envato Elements. Done up in retro style, it’s the perfect way to advertise any neighborhood event.
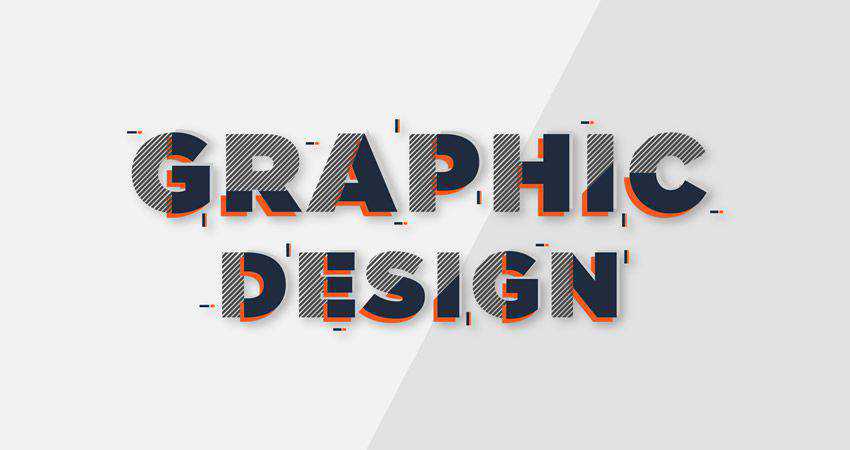
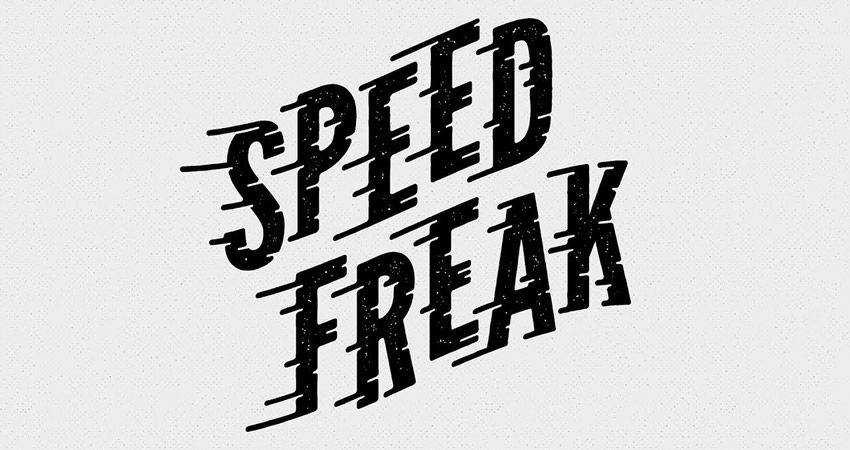
How to Create Sliced Comic-Style Text
If your project calls for a comic-style, consider using this tutorial to create a truly unique look. You’ll learn how to create an effective color palette and use a variety of Illustrator’s tools and effects to achieve this interesting design.
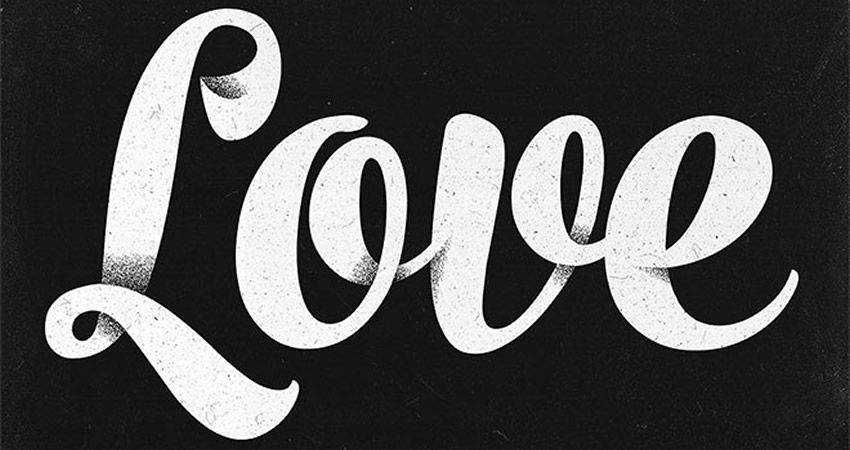
In this video tutorial, Teela shows you how to create vector based text full of colorful gradients that you’ll fall in love with. Start with the blob brush to create your hand lettering and then add shapes to create shadows and depth; color it in, and you’re done!

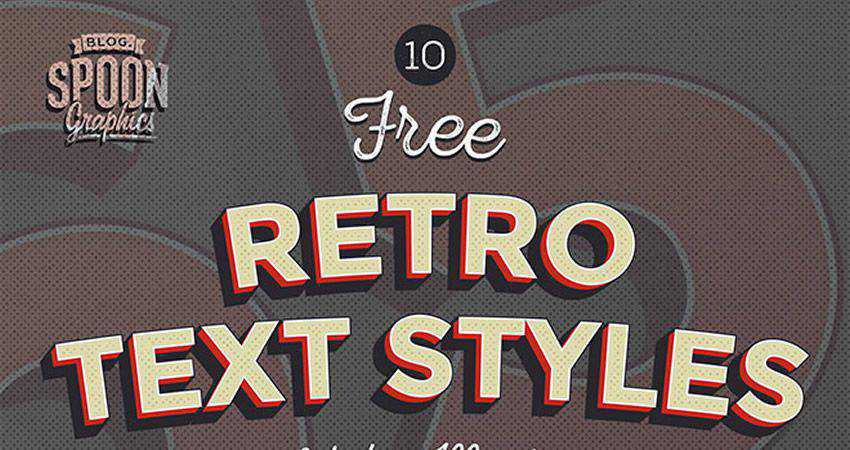
Add some color and flair to your retro-styled text with these retro text effects. This collection features a grand total of 10 different retro effects that you can load up in Illustrator and start using them in your projects.
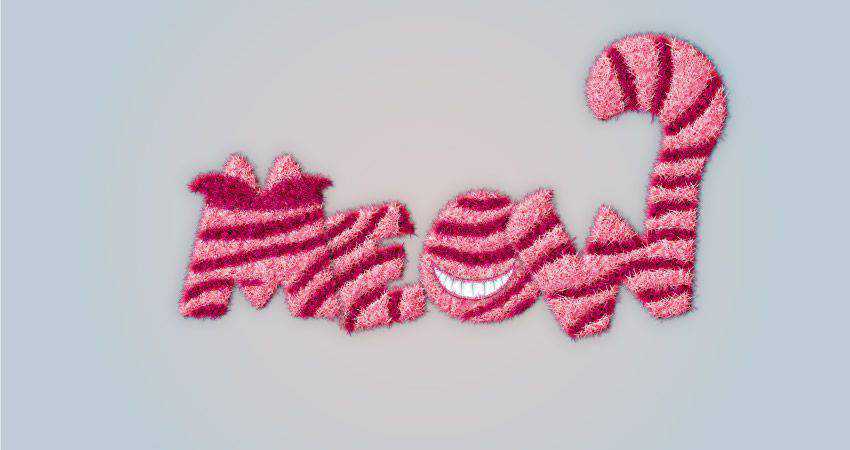
This tutorial was inspired by Alice in Wonderland and walks you through the process of transforming your text from plain to furry. Learn a new way to create the appearance of fur and how to use a Pattern brush to add extra fur for extra details.
This urban type tutorial was inspired by London. You will learn how to experiment with traditional and digital media, mixing patterns, paint, and textures to make your project unique.

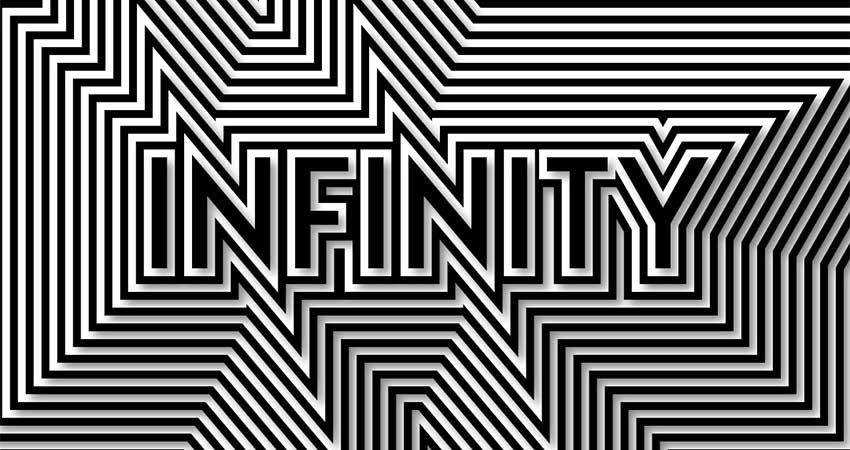
In this step by step tutorial you will learn how to make the best use of the offset path option to create a repetitive text. You’ll also learn the difference between using it through the appearance panel method and the menu bar method.
Create a sophisticated and elegant logo in 3D by following this tutorial. When you’re done creating the logo in Illustrator, you’ll finish off the design in Photoshop by overlaying it on top of a photograph.
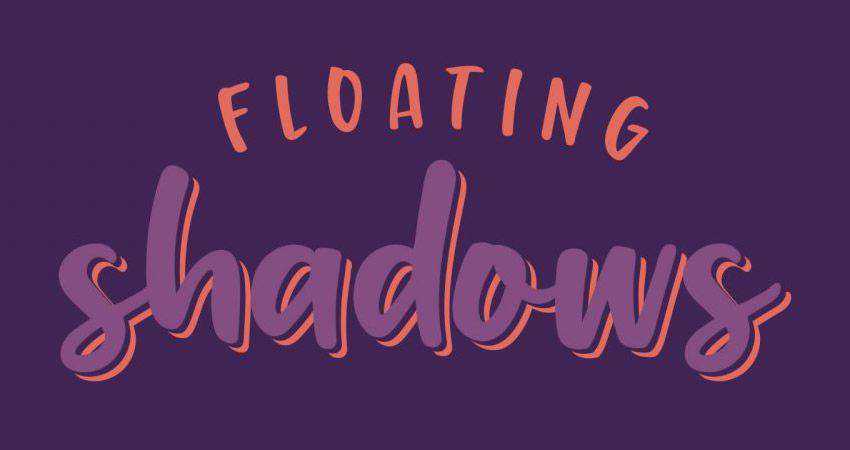
Learn how to create typographic floating shadows by turning the text into shapes and then creating a series of paths. The next step is to use offsetting and selective removals to finish off the design.
With this video tutorial, you’ll learn how to use the appearance panel to create really cool retro style text effects while preserving the live text to be fully editable. This is truly typography artwork.

As you can see, with some creativity and unique text effects, you can transform your typography designs and bring them to life. Use the tutorials above to master new tricks and learn new techniques that will make your designs more memorable.